
Establishing a floor
On laying down something solid

A few of my readers will read this and think: “you put in a new floor, what’s the big deal?”
It is a big deal for me. I outsourced most of the major renovation projects to professionals — taking down walls, removing countertops, and demolishing a basement.
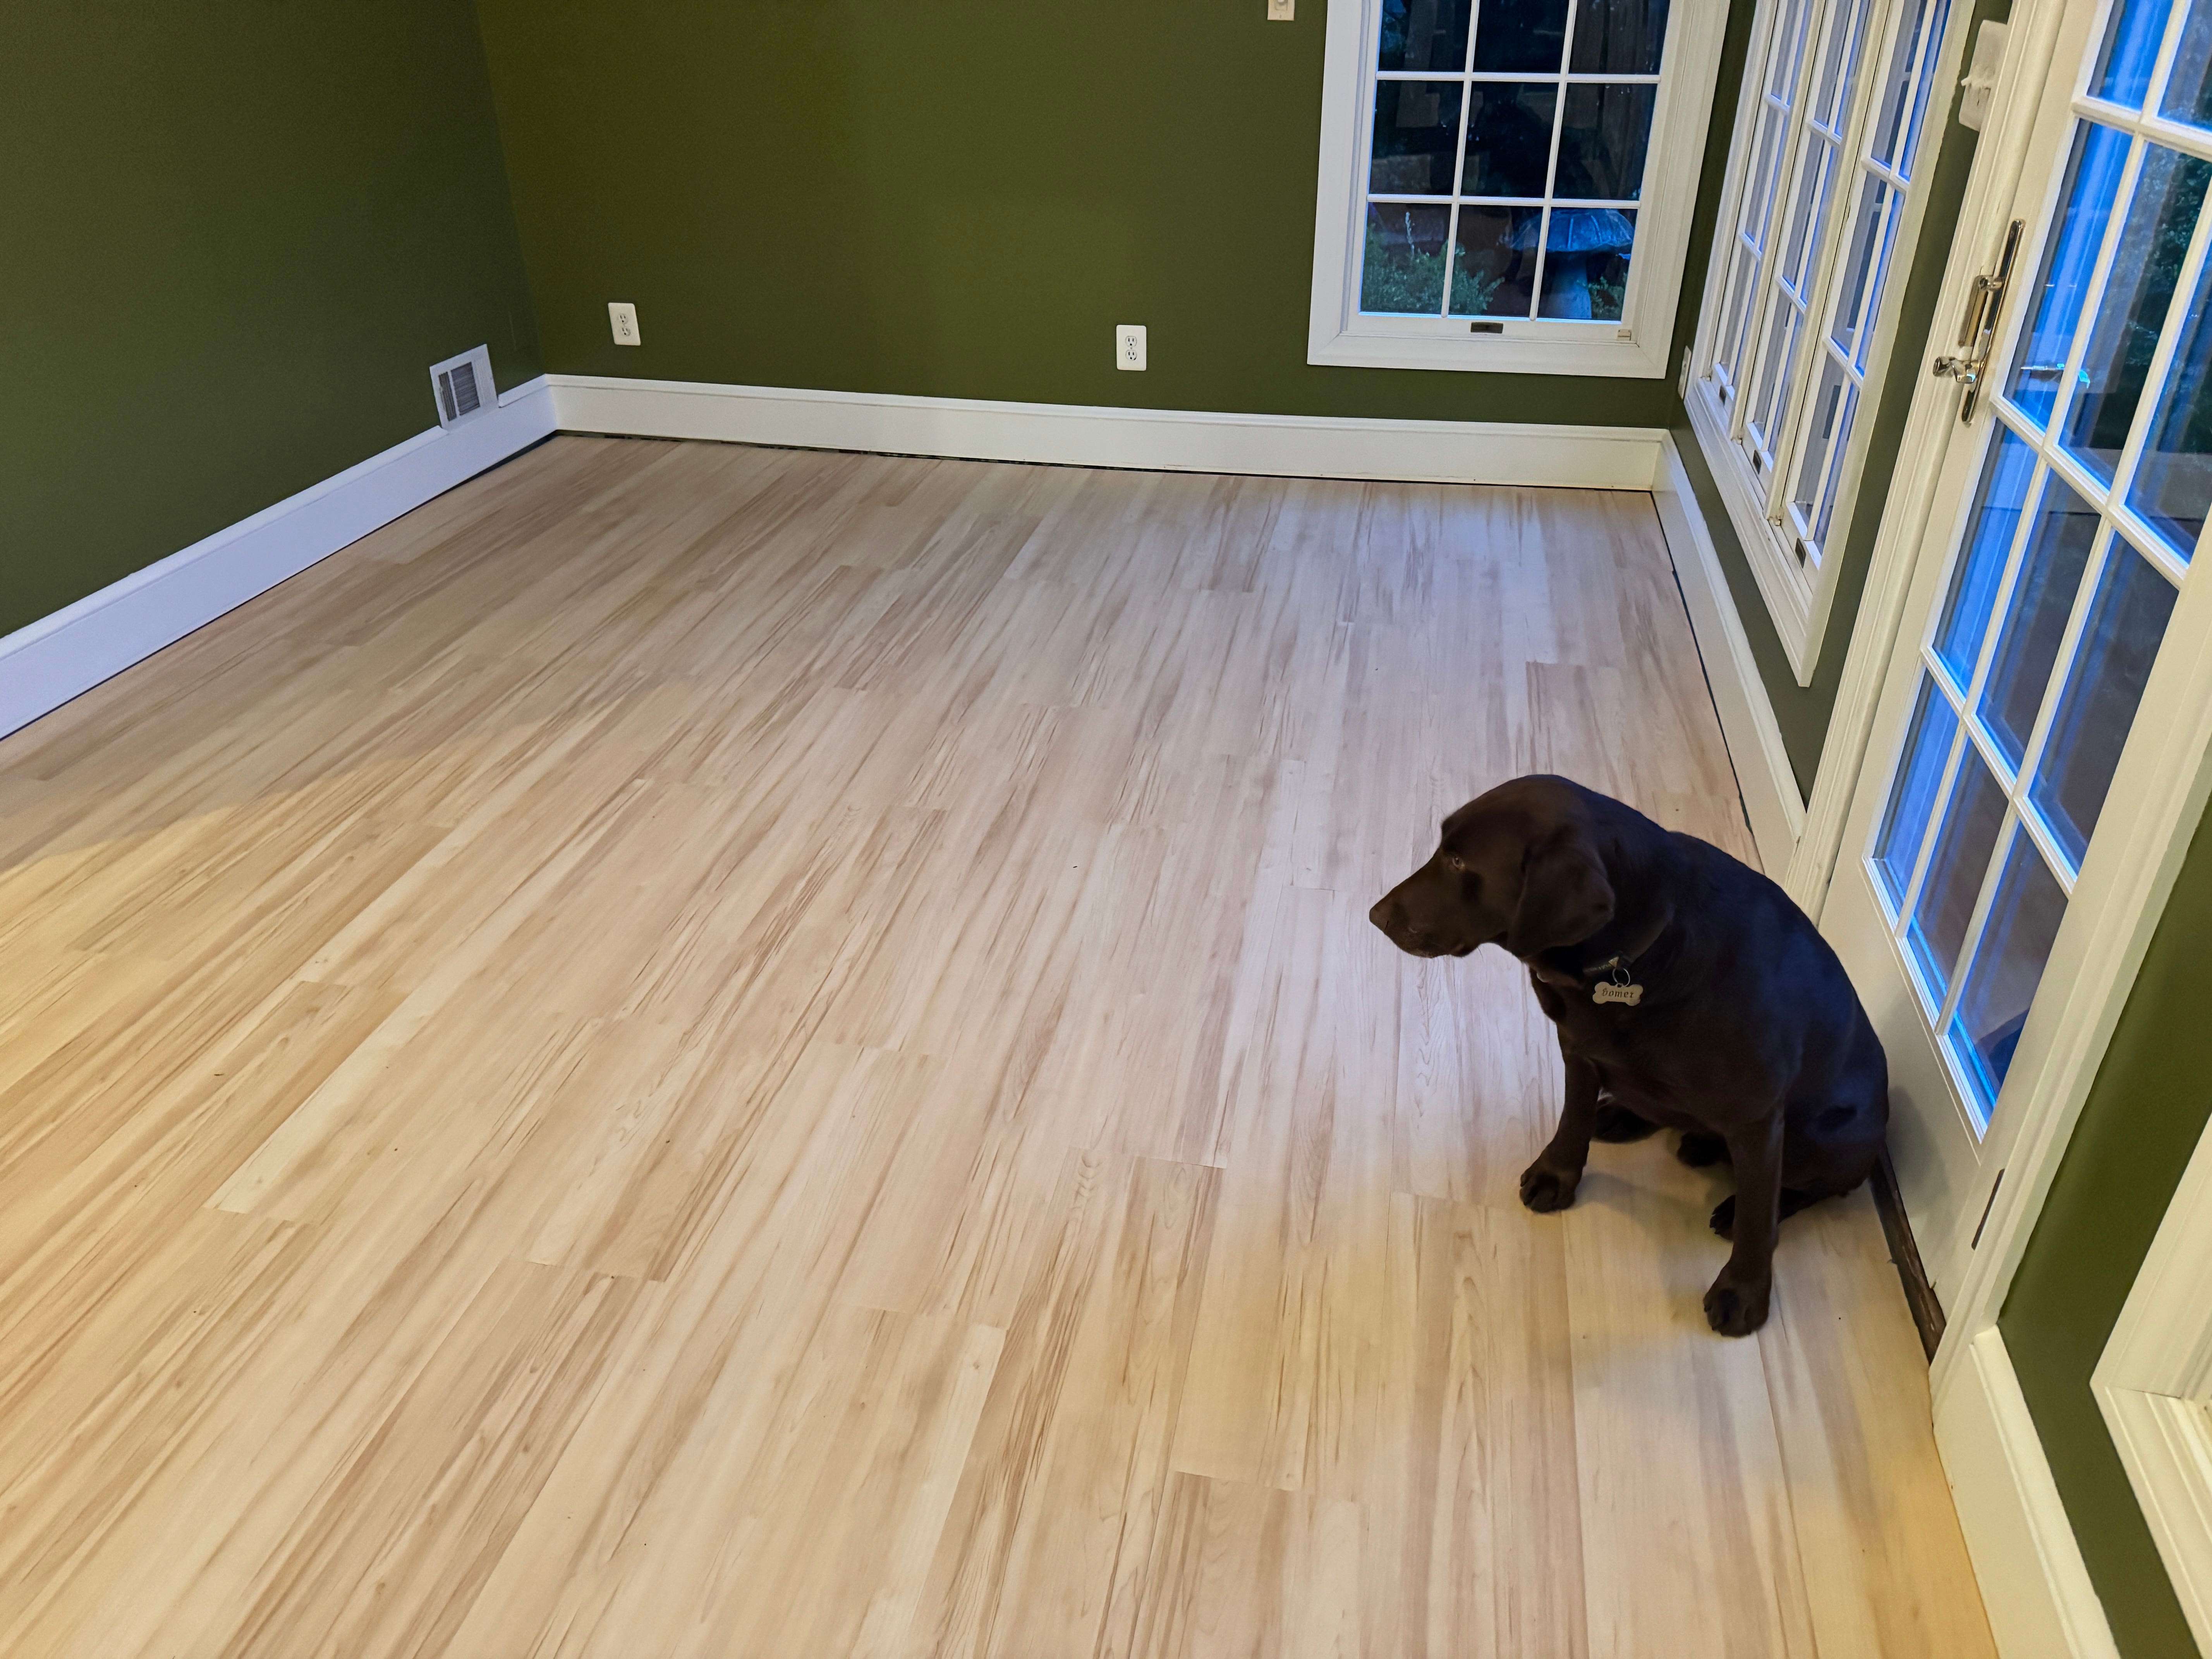
But I left the stained, off-white, aging floors of the Zen room (a.k.a. Homer’s room) for a project I could get busy with.
My hands aren’t built for accurate work. My thumbs are flat and stubby, and my fingertips lack the finesse required to piece together items of high detail. I also dislike replicating accurate measurements, and prefer to visually estimate something until it’s good enough.
What I enjoy is ripping stuff apart, throwing away the residue, cleaning it all up, then replacing half of what was there with something more utilitarian and aesthetically pleasing.
This is true of my physical world and many other aspects of my life.
The project was completed successfully, but not without endless agonizing about the right tools (I bought too many), predicting everything that could go wrong (things did go wrong, but not what I predicted), and a few minor injuries and soreness in areas I didn’t think could go sore.
I’m documenting this so I don’t have to re-learn the lessons next time.
Selecting the materials
This was a no-brainer. I was not going to mess with natural wood, and wanted something cheap, long-lasting, and easy to cut, connect, and maneuver.
Luxury Vinyl Plank (LVP) won by a wide margin. Home Depot dropped off the 11 boxes of flooring at my garage for free, and threw in a wooden pallet for good measure.
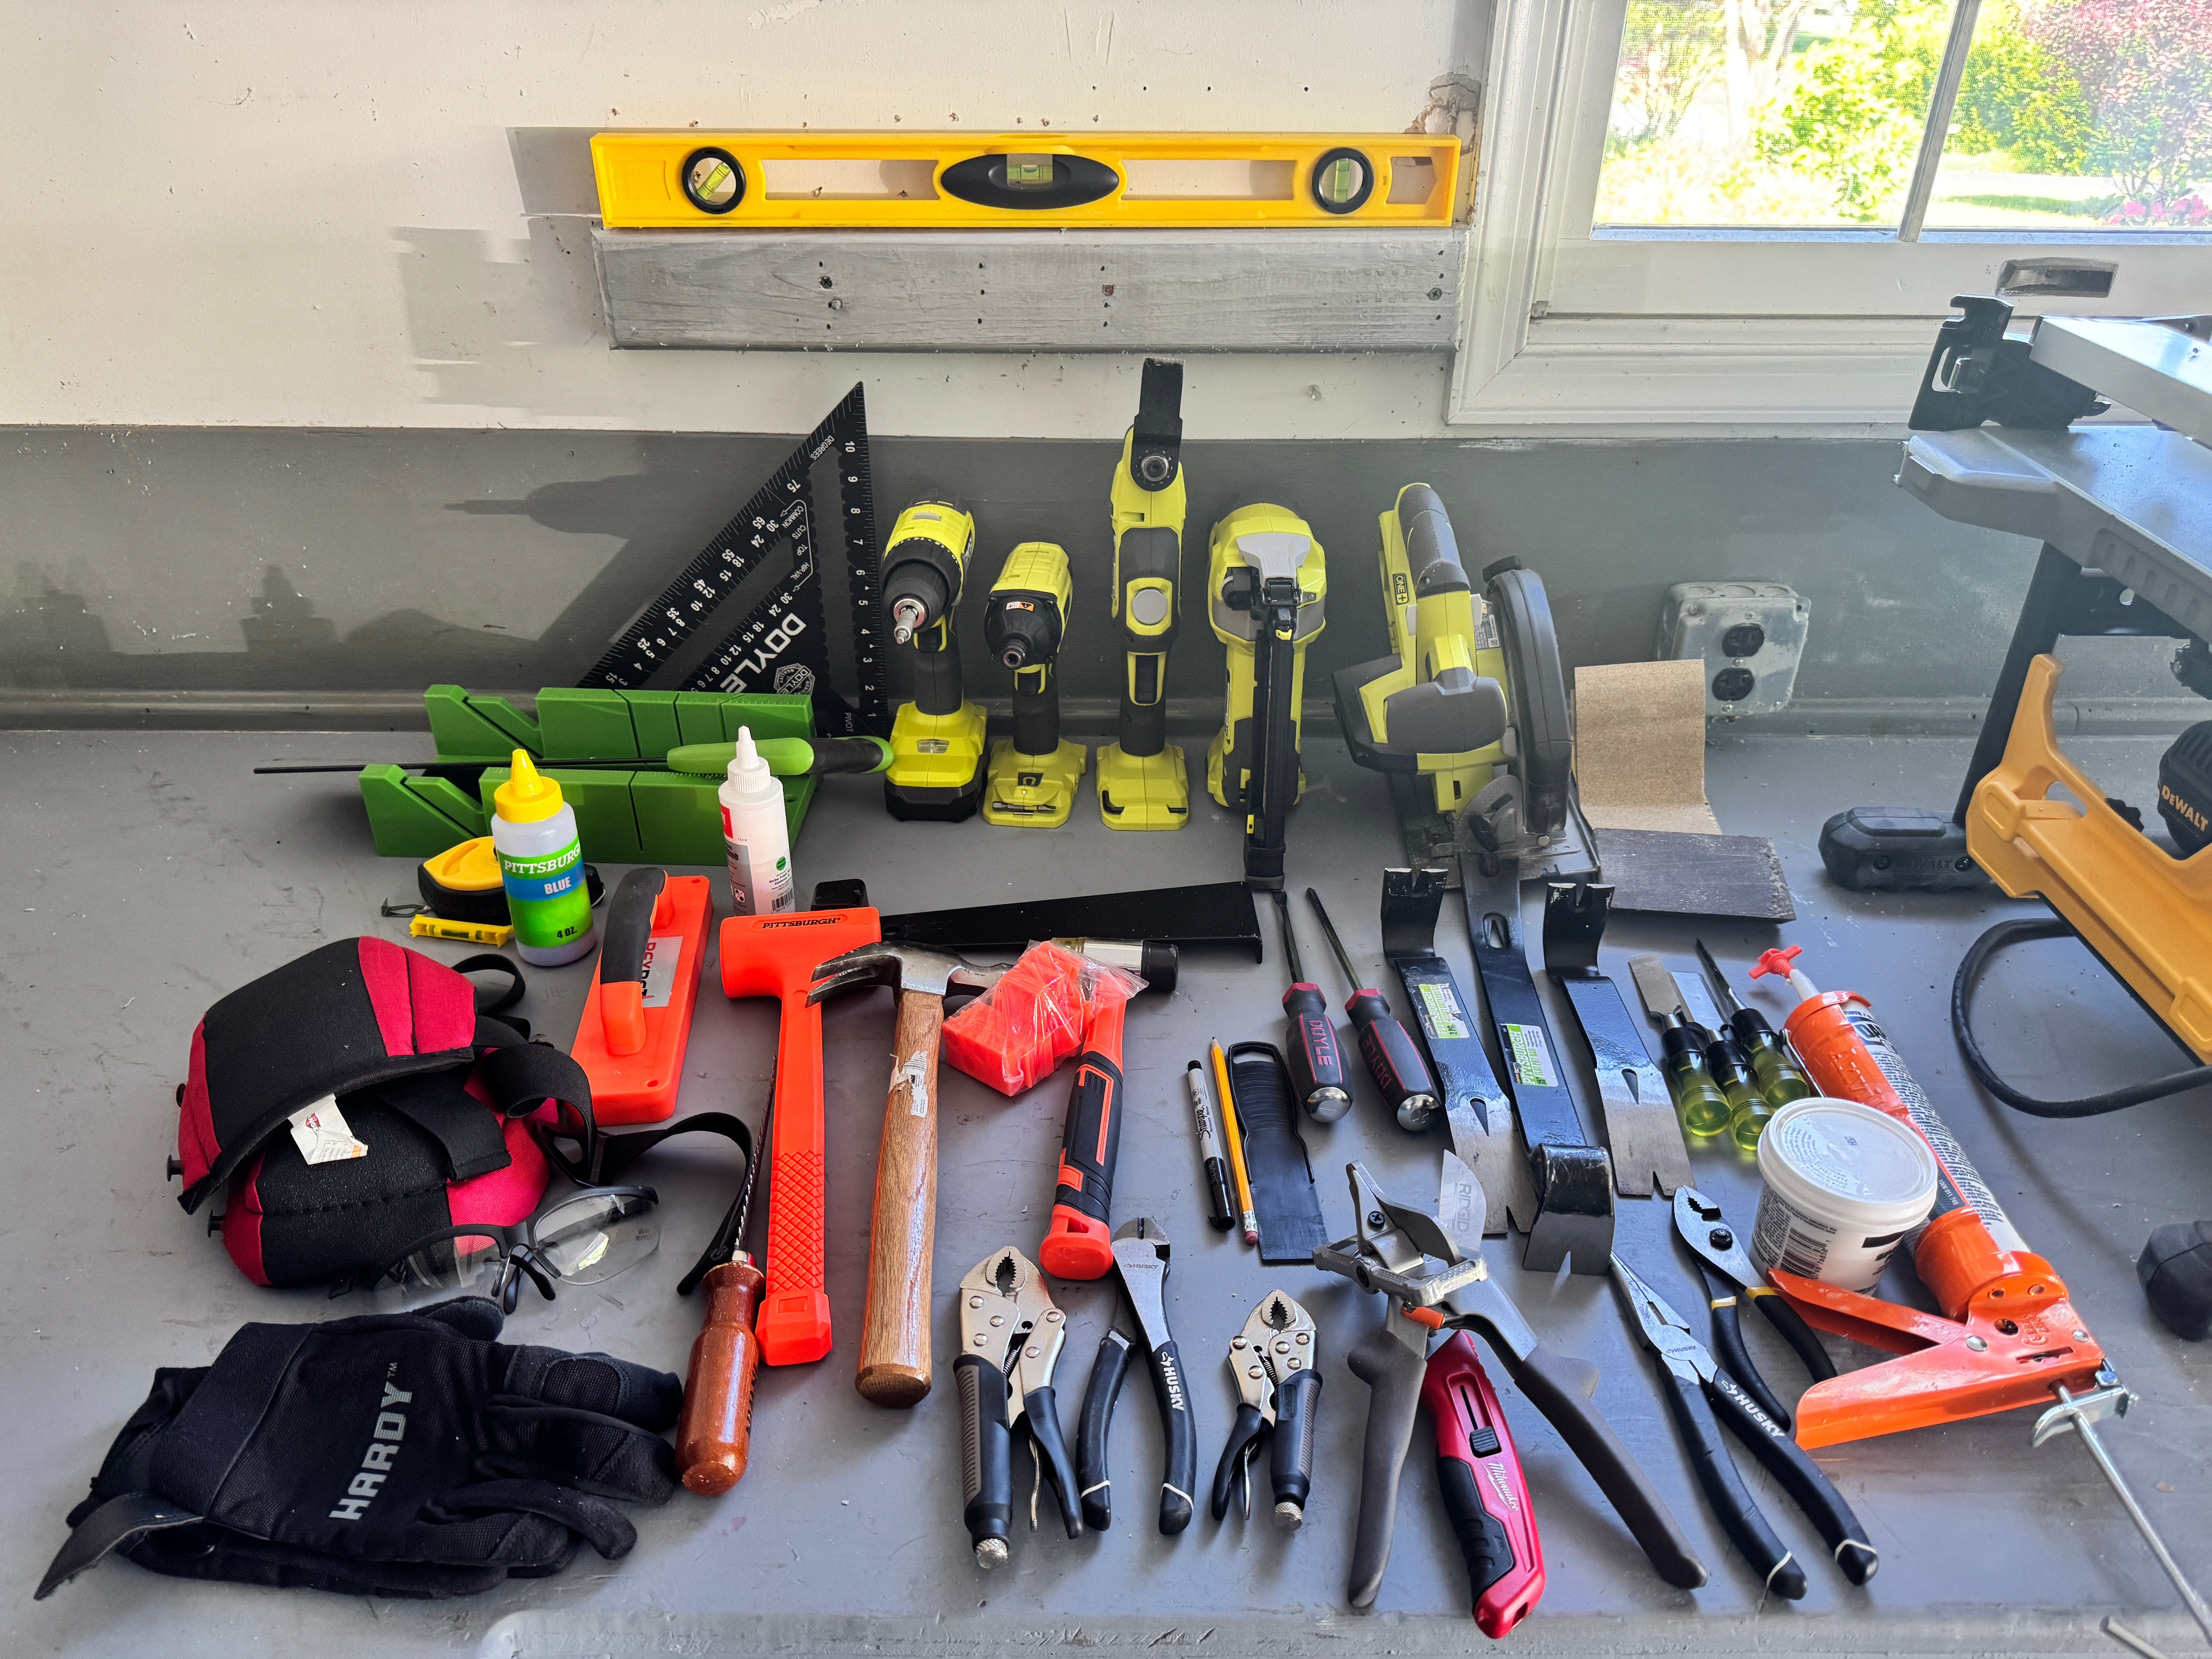
Tools
Many trips to Home Depot and Harbor Freight. Many unnecessary tools.
Four different kinds of chisels, three sizes of crowbars, glue, vice grips, locking vice grips, soft mallets, hard mallets, drill, hedge trimmer (it was on sale and I needed one), box cutter, replacement blades, and at least five different grits of sandpaper.
A vinyl hammer and tapping block kit from Amazon.
A multi-tool, and my favorite purchase, the nail gun.
The free wood pallet made a good testing ground for all the mechanized cutters.
The delta between the cost of the vinyl planks and the contractor quote was the easy justification to spend the money I ‘saved’ on all this excessive equipment.
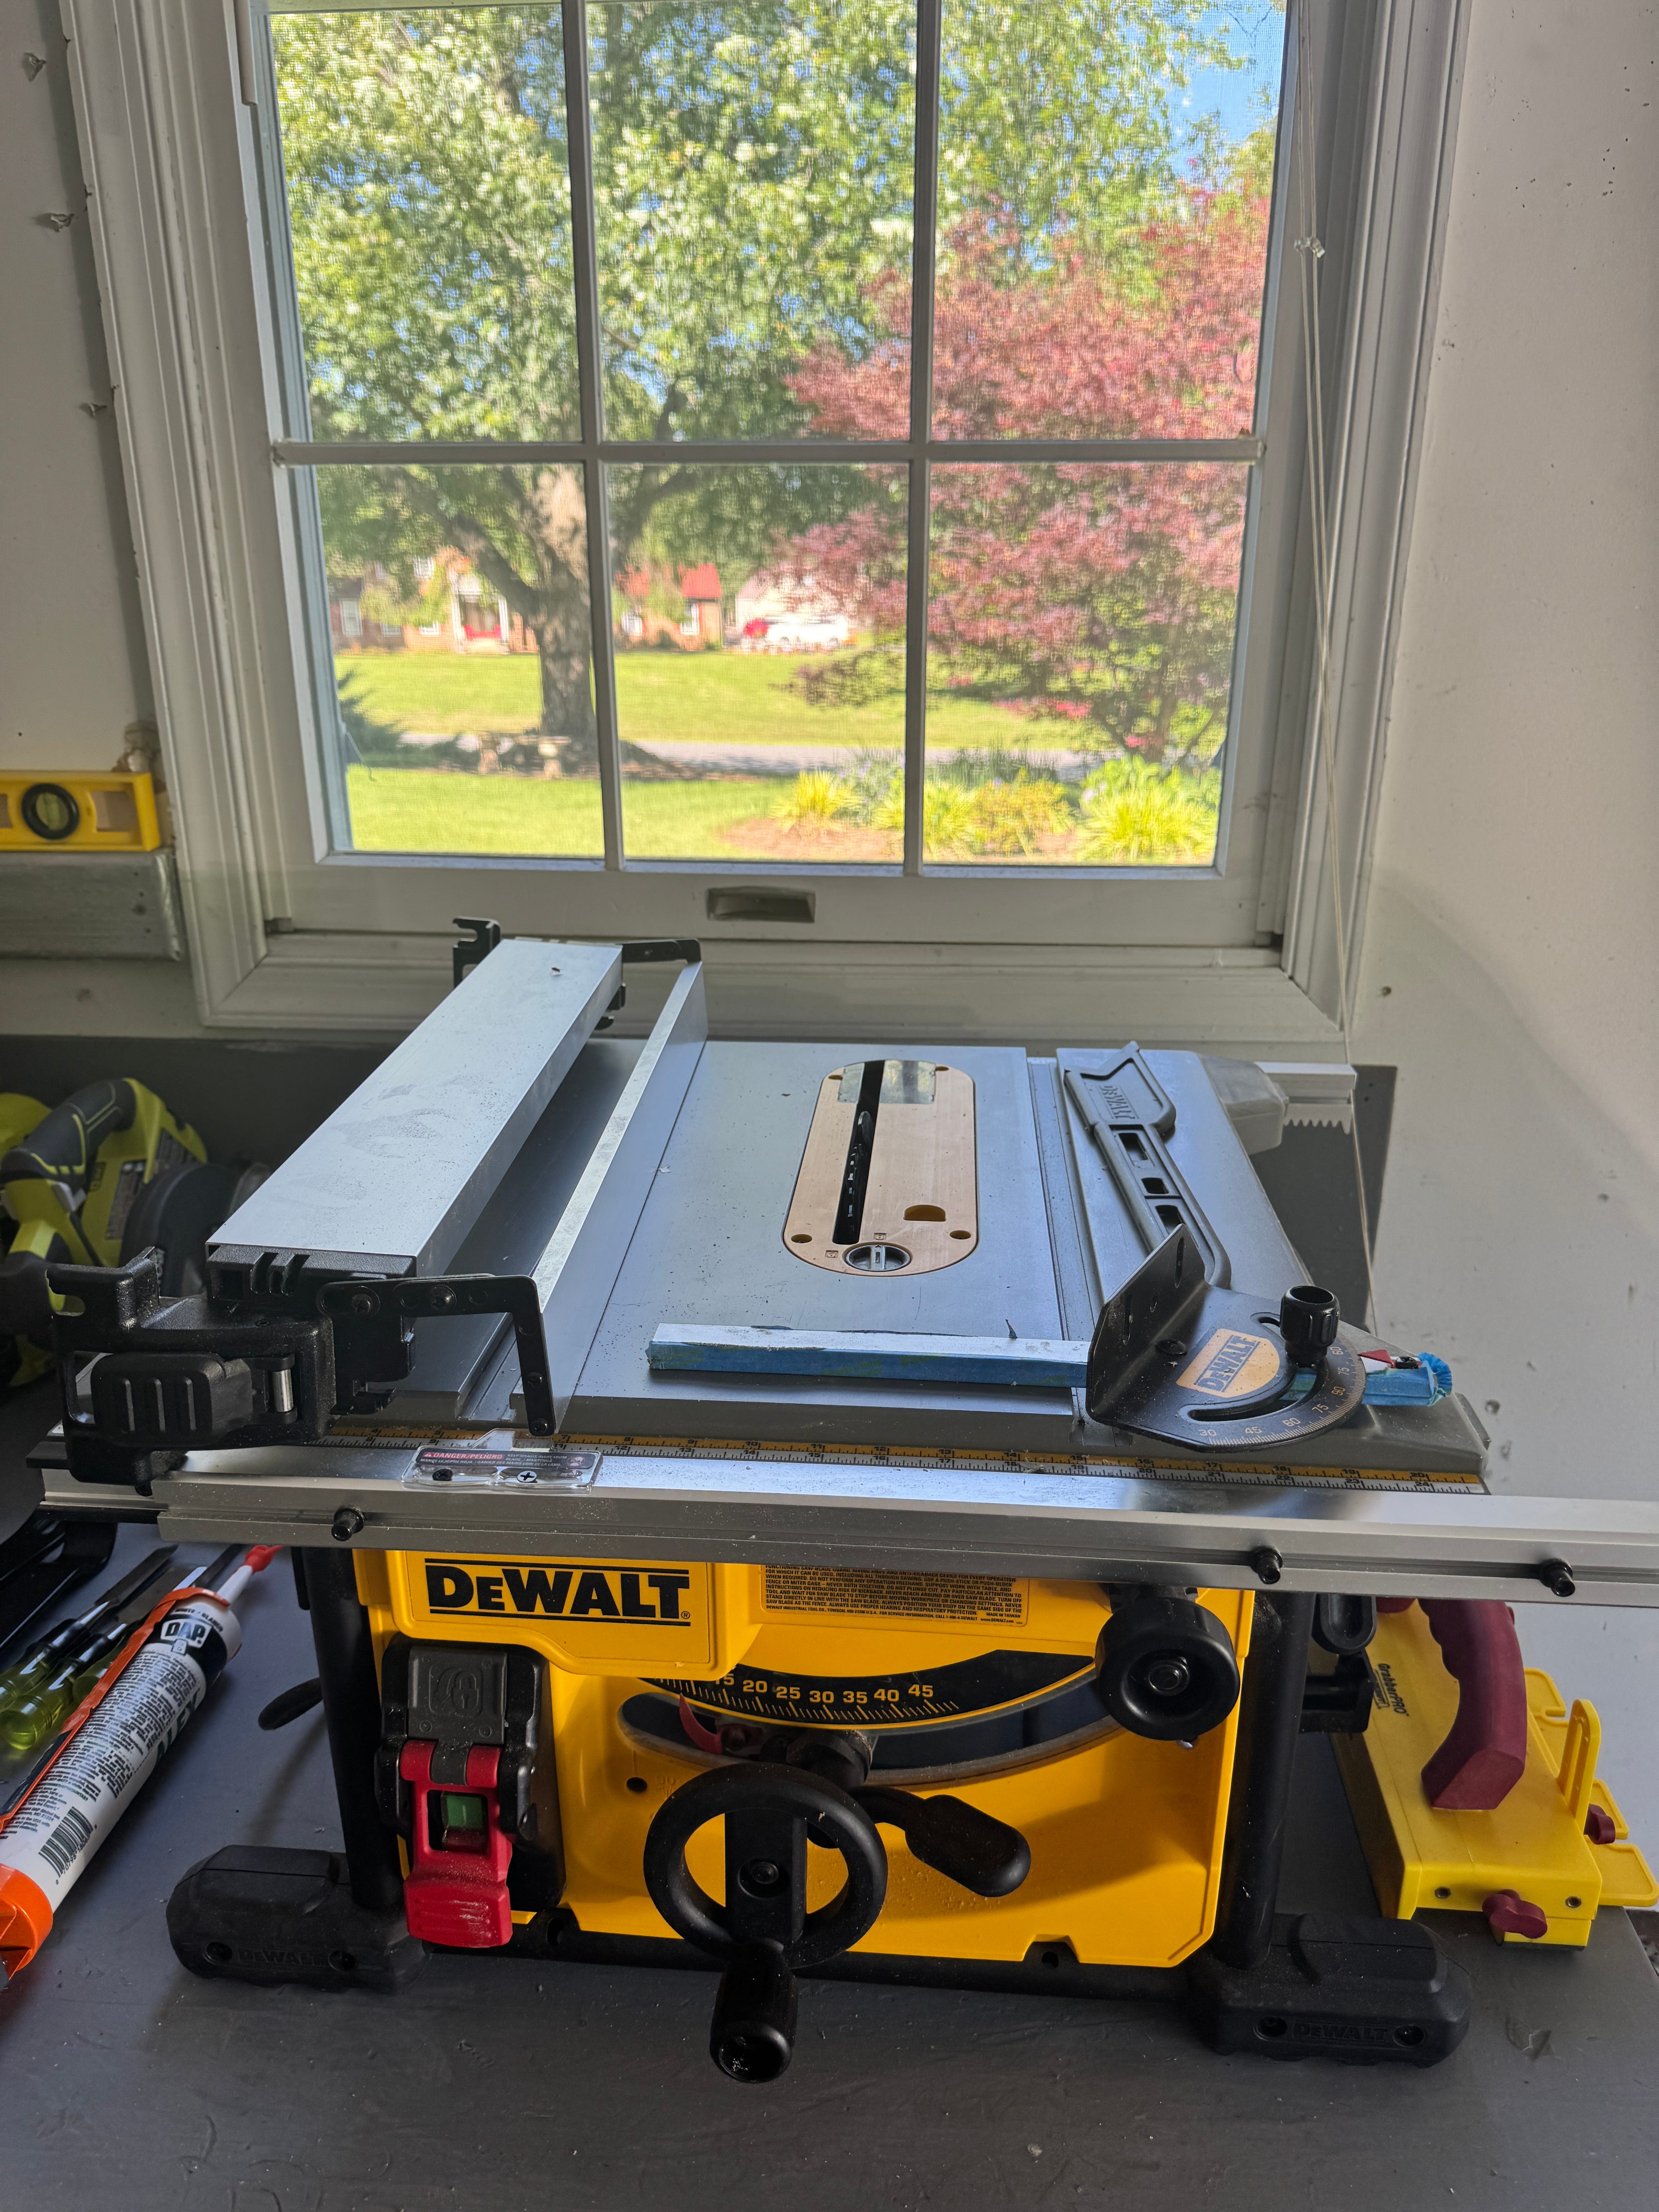
Vinyl planks can supposedly be cut and scored with a utility blade. But we weren’t going to accept that. Mohamed bought his big bertha beast of a table saw to the show.
The tools I really ended up needing:
The nail gun. A good angled trim cutter. The table saw (or circular saw), because scoring and cracking as recommended is for suckers. Good gloves, safety glasses, tapping block, soft mallet, measuring tape, and a vacuum.
Preparation & realization
I did not remove the baseboards.
I attempted to salvage the quarter mold (the circular strip between the baseboards and the floor) and broke the first one. I scored the rest carelessly and pried them off in minutes. I also carved a deep scoring hole into one of the baseboards in the process, which I hoped the new PVC quarter molds would cover.
They didn’t.
Then came the demolition.
After removing the first piece using my new multi-tool and crowbar, I realized the floor was actually red brick.
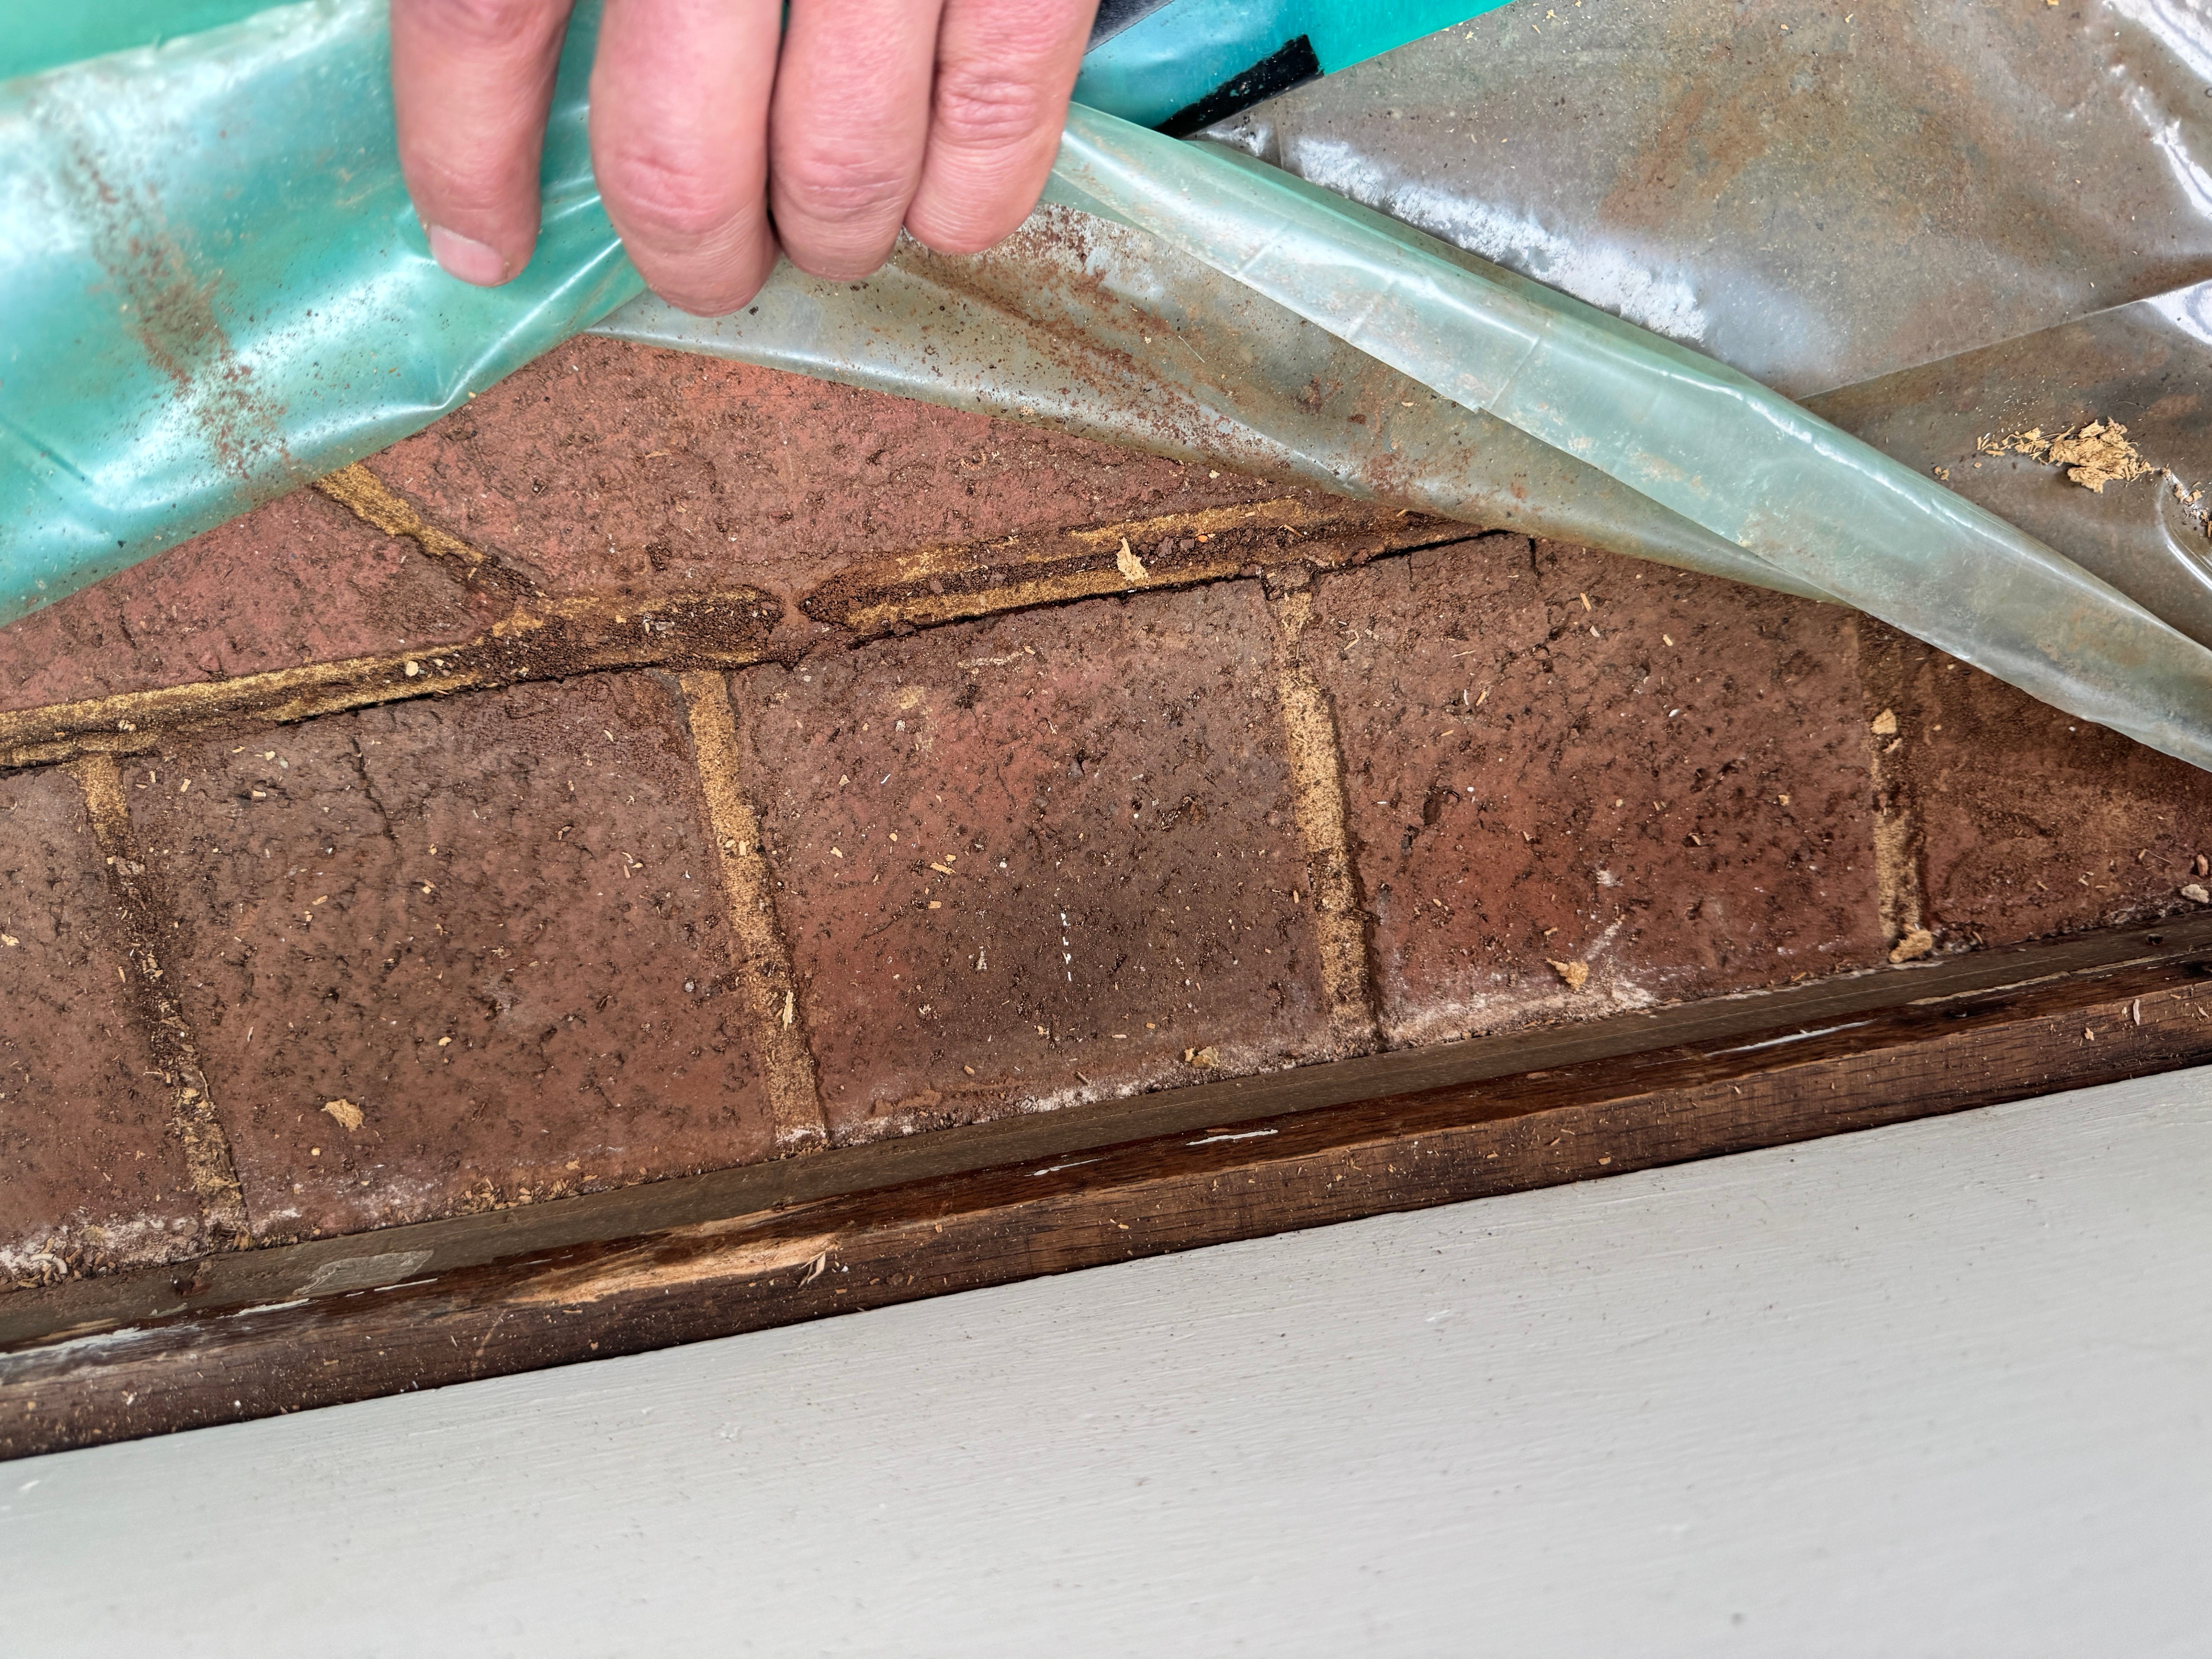
They had built the room on the outside of the house directly on the brick, by covering the brick with insulating plastic, then a rubbery foam layer, then the crappy compressed wood.
This resulted in endless googling, since the manufacturer demands an eternally level surface. The consensus was that I needed to level the gaps before installing the floor, or all hell would break loose.
I consulted my trusty partner, and decided to leave the plastic shield, dispose of the decomposing foam layer, and take my chances with the installation.
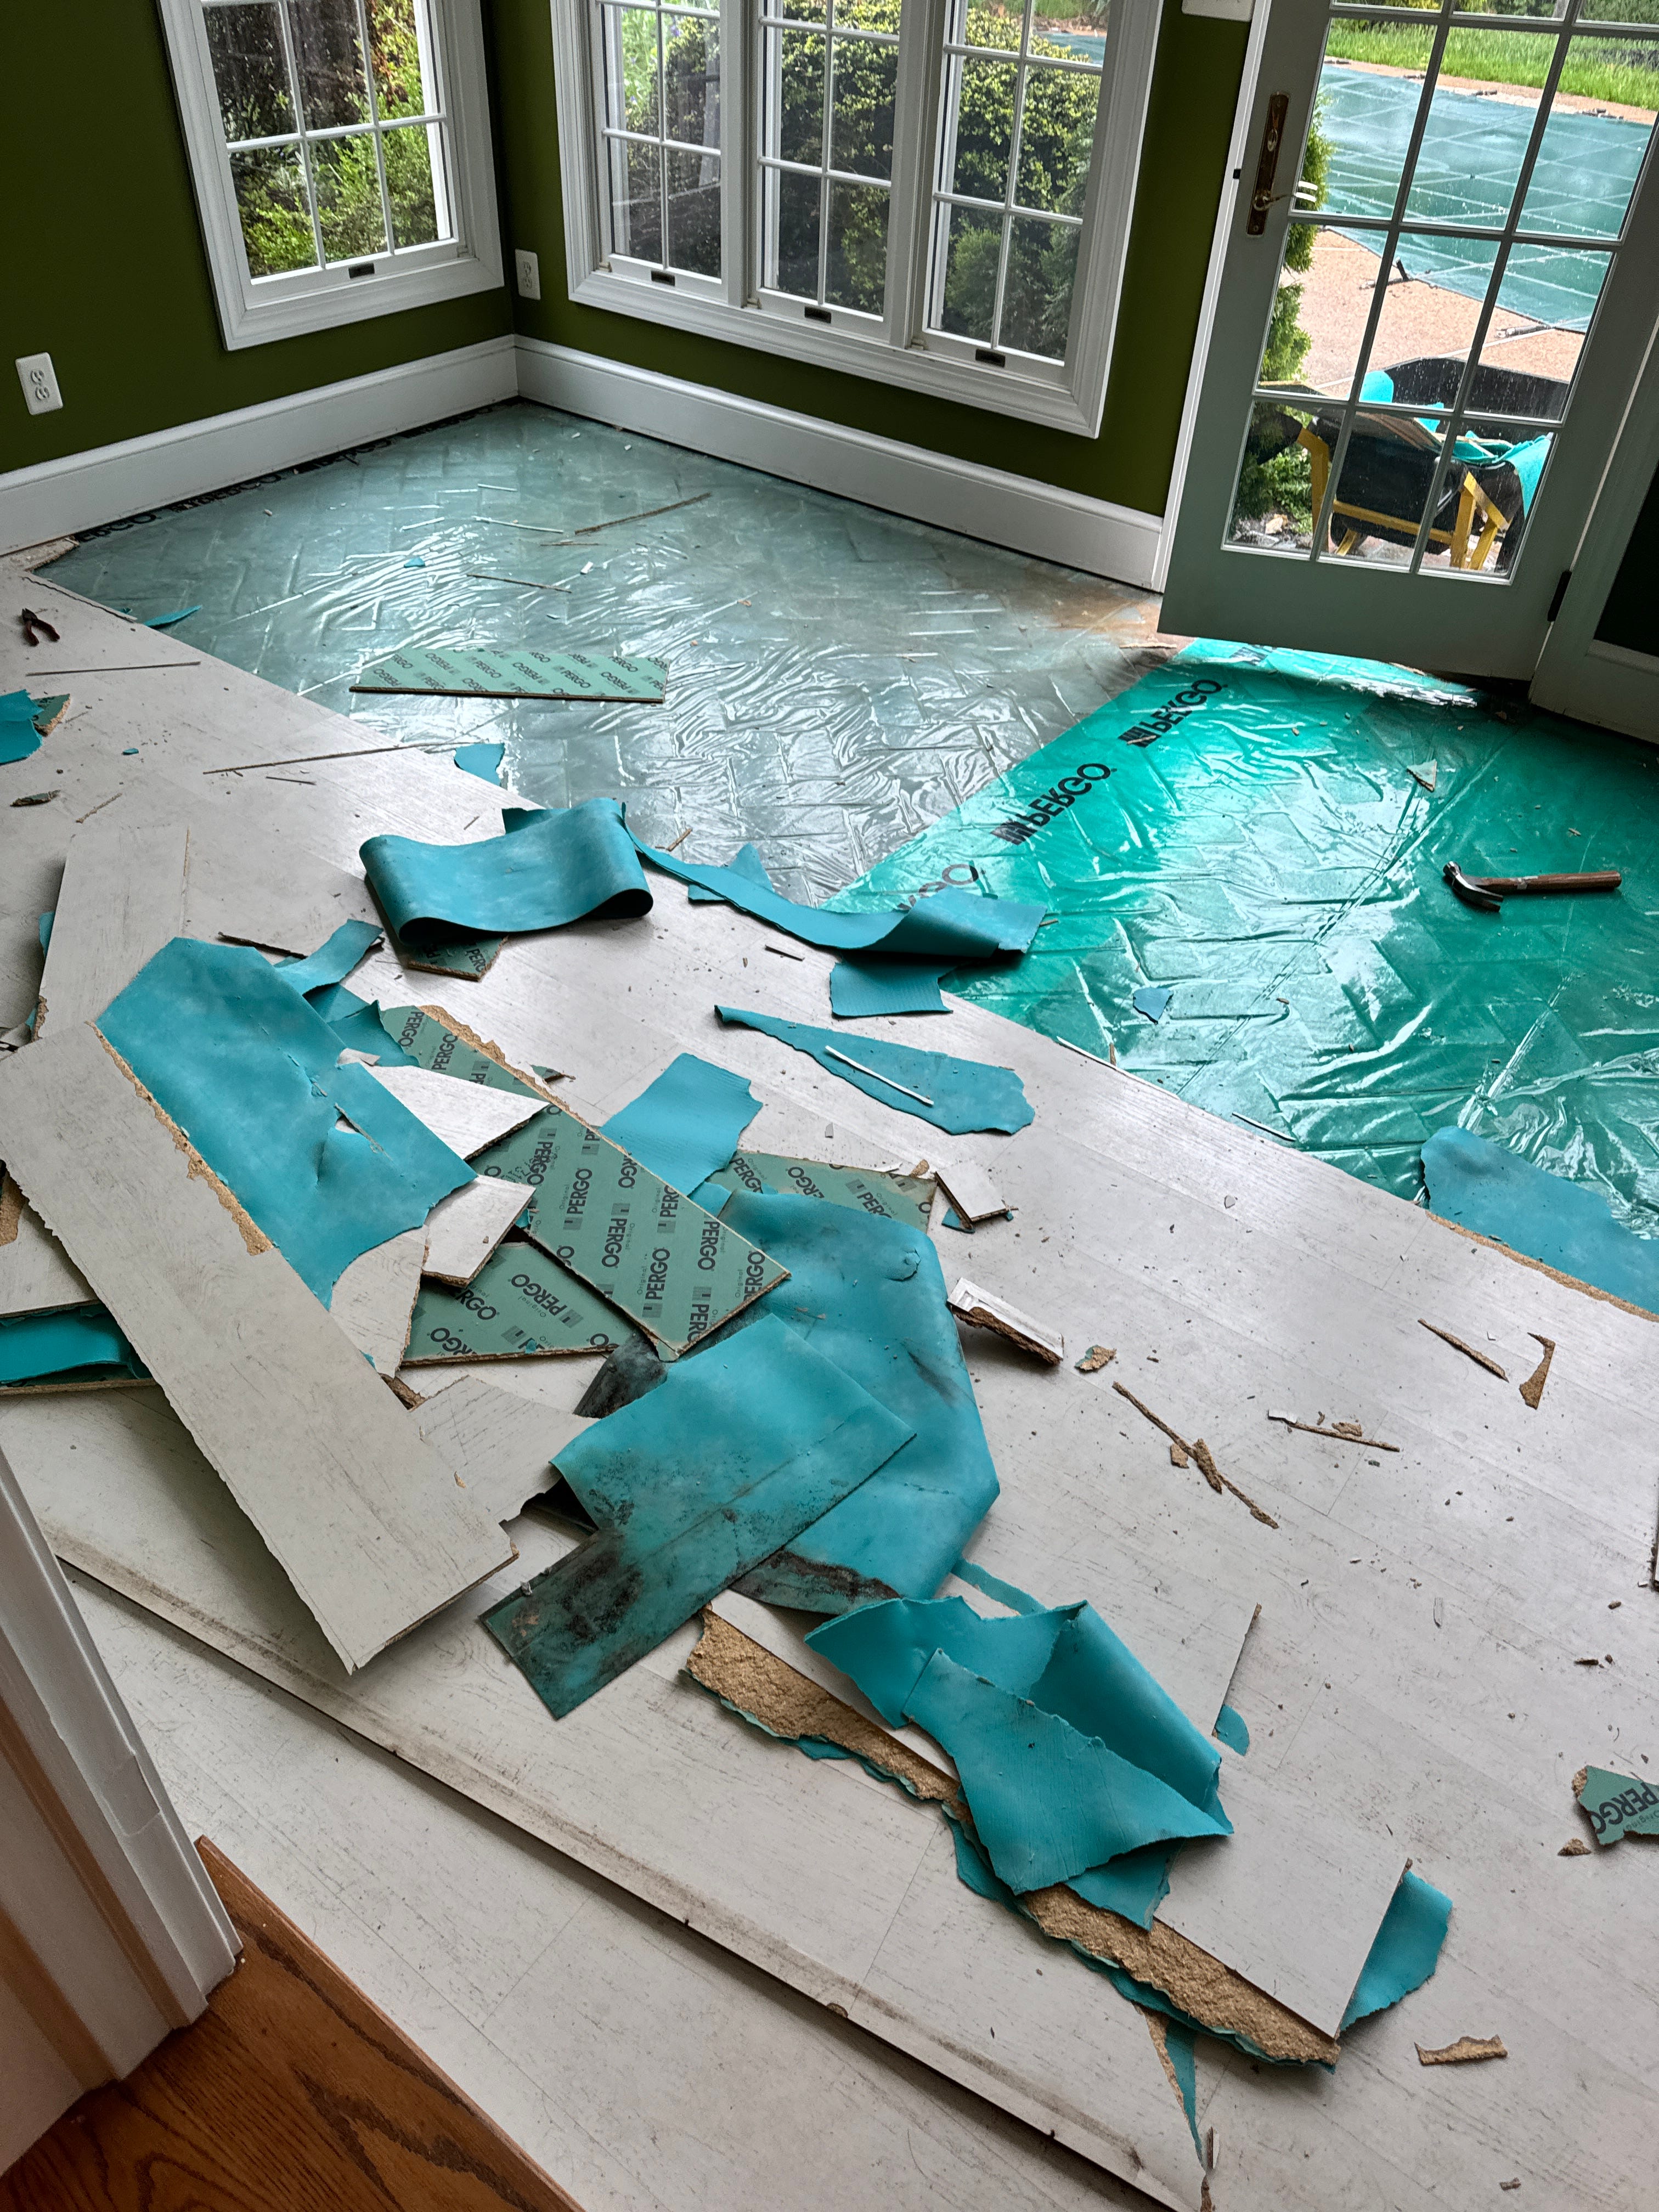
The demo went painfully slow for the first two rows as I tried to release the pieces of wood with a combination of brute force and leverage. Until I discovered the magic of standing up, pulling up as high as I can with the crowbar, and smashing down on the plank with my feet to create a clean break at the seams.
As I progressed, I was able to release two, sometimes three planks at a time.
Three hours later, I was done. The big haul of wooden trash made its way to the garage in at least four wheelbarrow hauls in cats and dogs rain.
Installation
Big jobs are better done in a pair. Moral support, shared problem solving, and manual labor that scales when your partner is knowledgeable and willing. Hence the arrival of Mohamed with his big saw.
There is also a reason why the manual says go left to right. Even though I’ve read it multiple times, I started from the right side, on the longest wall of the room by the entrance.
By the second row I was questioning why every new piece required lifting the previous piece to engage the connecting mechanism, which resulted in the previous seams breaking and requiring rework.
Turns out when you start from the left, the seams fall on the top. Other than the ‘wiggling’ motion required to line up the long seam, then the prodigious hammering to close the gap, the process was straightforward.
Then came the realization that sometimes the standards we set are way too high.
Mohamed refused to accept any visible gaps between the pieces.
Gaps, like cracks, absorb light and create a dark disruption between an otherwise seamless beauty. These untenable standards, and the unevenness of the brick floor underneath, made for extended bouts of painful, excessive hammering.
After taking a break and examining my laundry room, I realized I had gaps that could lose a sock in the rest of my floors. We eased up on the requirements and the process moved much faster.
Start from the left. Connect to the top row. Wiggle, hammer, tap. Attach the next piece. Continue until the end of the line.
Randomness
It’s essential to shuffle the pieces across boxes. Apparently the pattern is printed on, and starts repeating quickly.
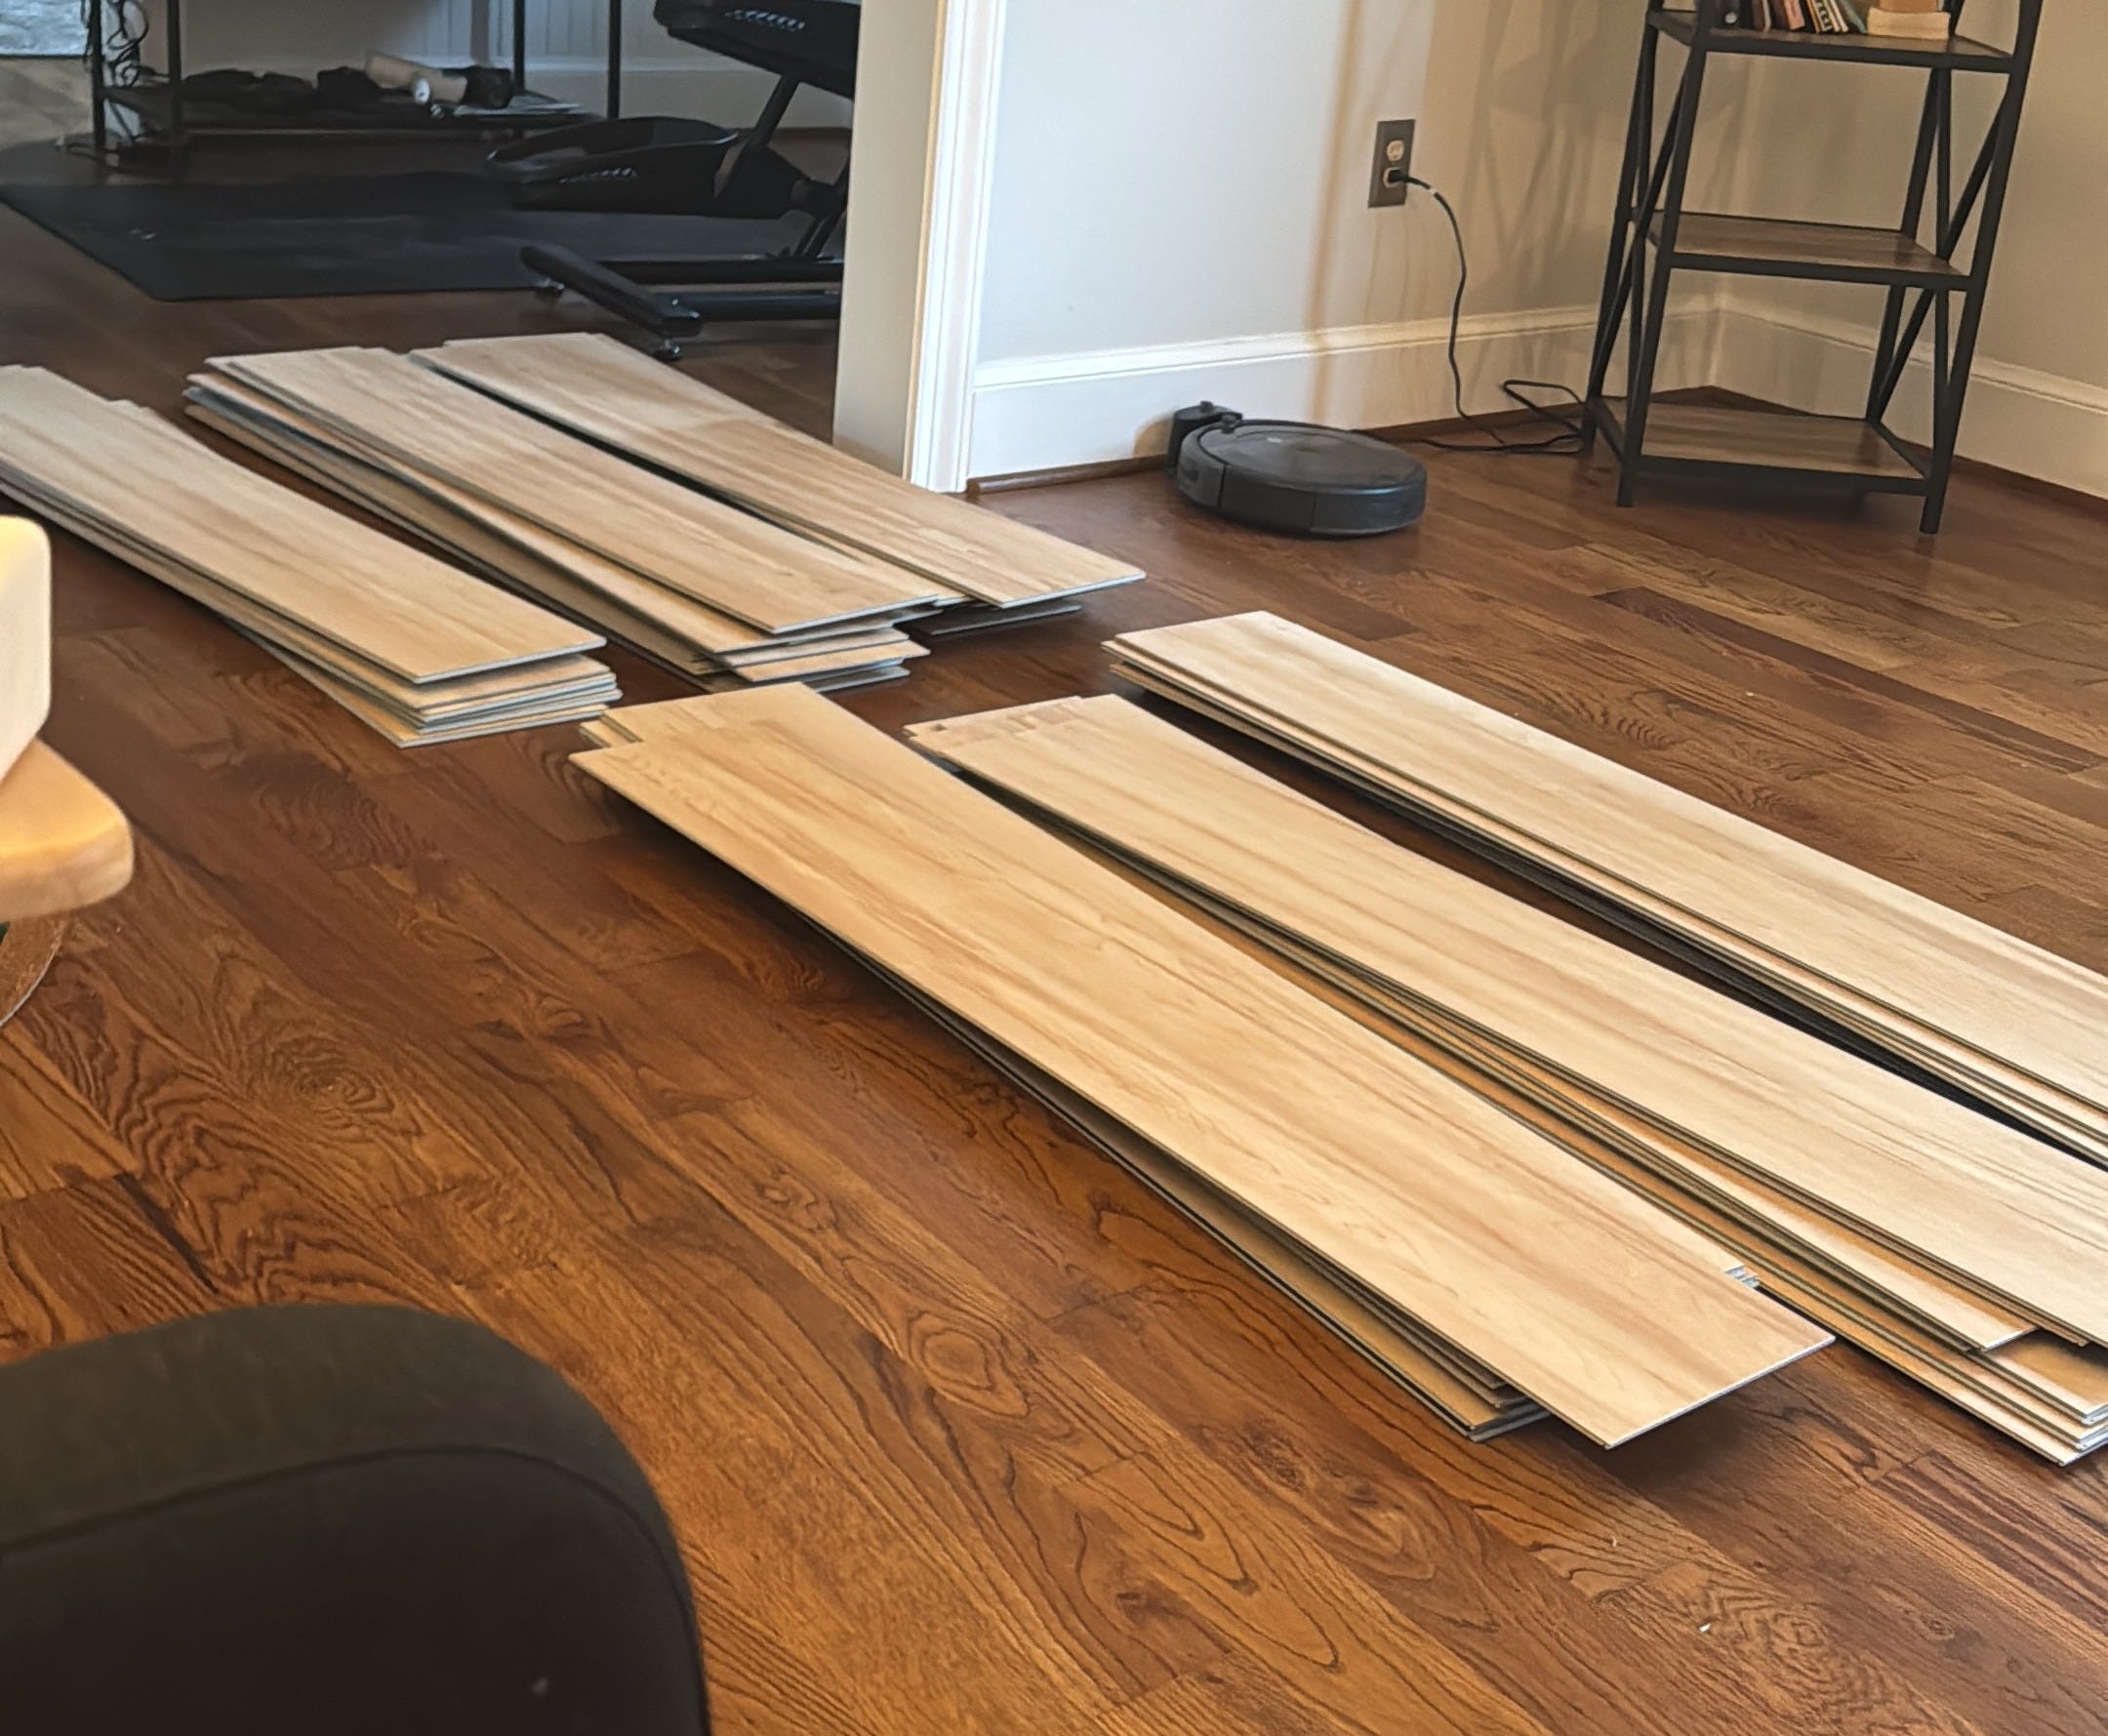
Lay the boxes side by side, build a layer of 8–10 pieces from different boxes, then repeat to create an assembly line, and pull from the shuffled pieces as you assemble.
When you reach the last piece on the first row, rotate it 180 degrees, mark on the edge of the installed piece, and that’s your cut line. A good shortcut that replaces using a measuring tape, subtracting from the existing length, and placing a cut mark.
Also: always leave a 1/8 to 1/4 inch gap between the first and last piece and the walls (check the instructions for the exact measure).
These things expand and contract.
The last row
If you’re lucky, the width of your room will be exactly divisible by the width of your plank, and the last row will lay down perfectly. Most likely it won’t be, and you will require a horizontal cut across the long edge of the plank.
You can attempt this with the scoring knife and cracking, but good luck with that.
That is where the magnificent table saw (or your old rusty circular saw, when your friend is no longer available during night shift) comes into play.
Since the edge will be hiding under the quarter mold, you don’t need to worry about making a perfect straight line. Make your measurement, draw a straight line with a ruler, and cut as straight as you can. Keep your spare hand away from the blade.
Uneven shapes and jutting walls
You will come across corners and protrusions mid-build. Luckily for me, I only had three. The solution is very simple.
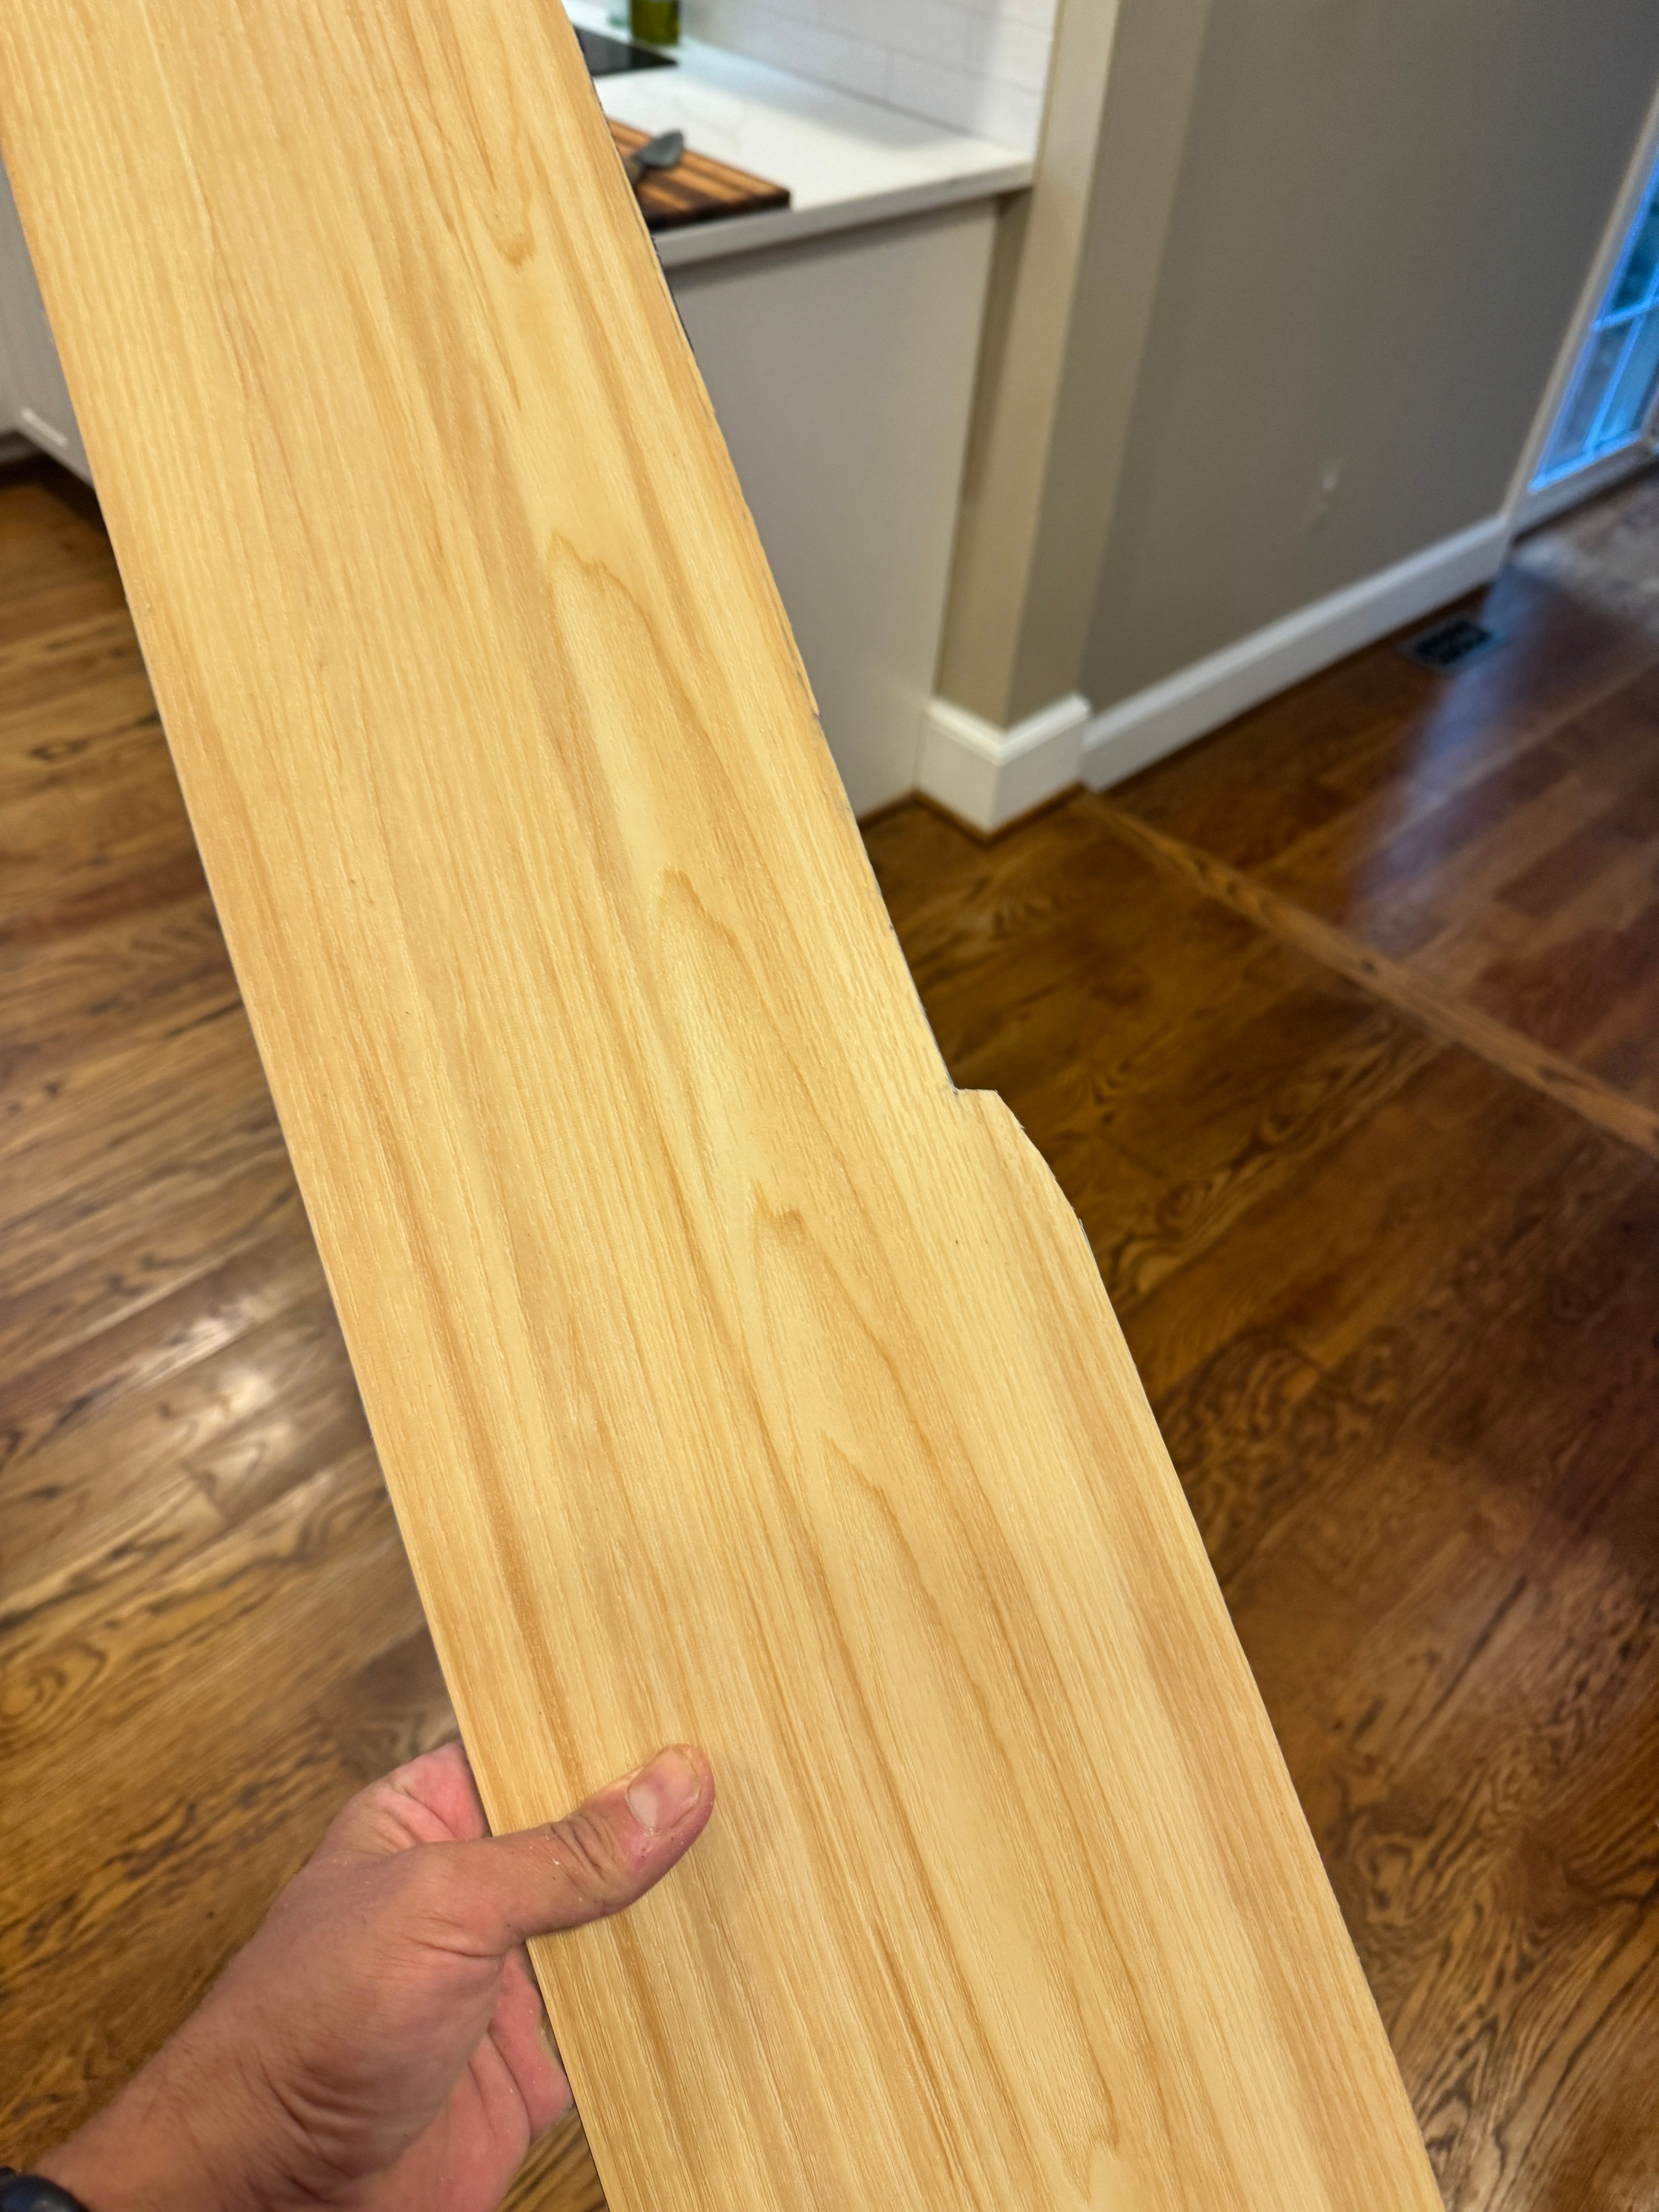
If you have a multi-tool (you should), use the stabbing blade to make the angled cuts you need, and finish the rest with the utility blade. Use the circular saw if the cuts are along the long edge. If you don’t have one, a scoring knife and some force should be enough.
Remember that most of what you mess up will be hidden under the molding.
Finishing up
When you lay the last piece, step back, admire your work, and prepare for the most annoying part.
Making angled cuts on the quarter mold (use the magical tool). Measuring exact lengths between walls (add an inch to your measurement, then cut away thin strips to jam it in tightly). Joining two pieces without creating a gap (good luck with that — I ended up cutting small pieces and jamming them into the gap).
Use your nail gun to nail the molding to the baseboard. Not the floor — that defeats the purpose of a floating floor and will cause it to buckle and disconnect.
Then caulk the perimeter, dab it into the tiny nail holes, and ignore the 5” gap created by your unlevel floors and the thinner planks in the right corner of the room.
The cleanse
Vacuum the mountains of dust created by the power tools (if you used a scoring knife, you won’t need to worry about this).
Lay a tarp in the bed of your pickup, and throw in all the torn-up pieces of wood.
Drive 15 minutes to your local dump, and marvel at the fact that the Prince William County dump takes your trash without charging you a cent, as long as you produce a valid driver’s license with a local address.
And remember that the last time you visited a dump was almost ten years ago, when you tore up the floors of your then life and moved to America.


Some floors you can buy in 11 boxes and lay down in a weekend. Others take longer, leave bigger gaps, and need a lot more caulk.
Both are worth doing yourself, at least once in a lifetime.
Here’s to many more floors.